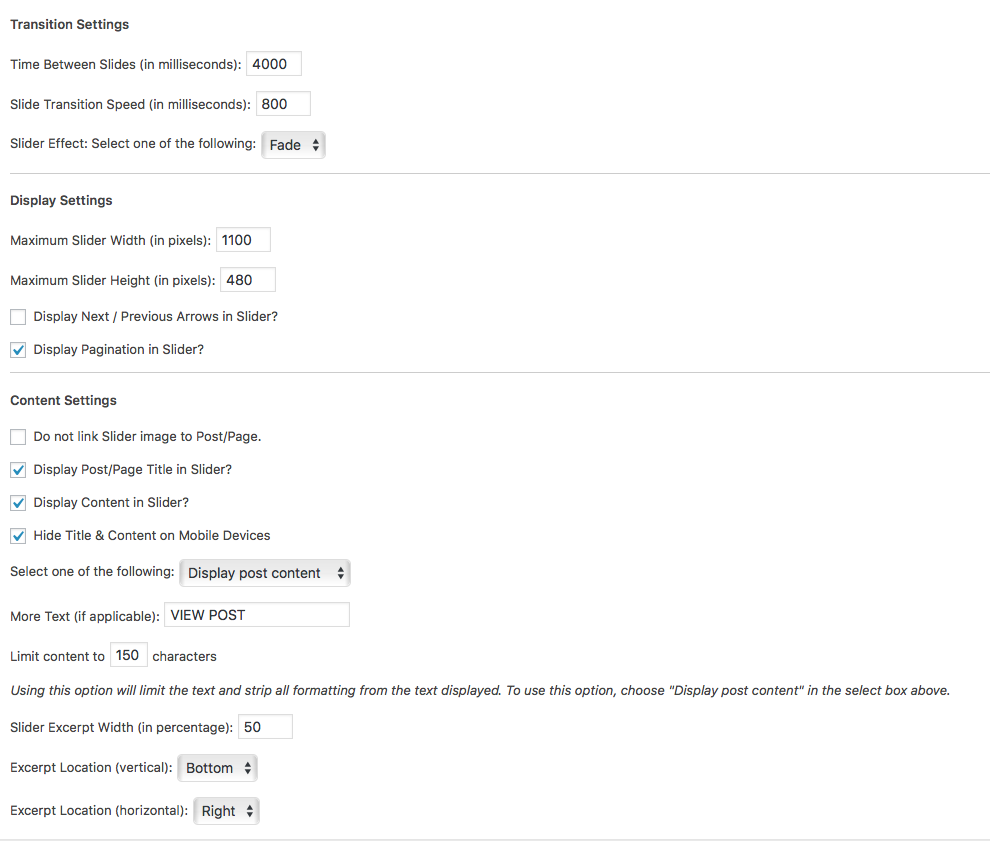
Once the Genesis Responsive Slider has been installed and activated. A slider settings page will show up under Genesis tab.
Configure the settings just like the live demo below. Of course, you could experiment with different settings see which suits your blog the best but this is the settings the live demo set.
Once you are done with the configuring, save the page. Go back to the “WIDGETS” page and drag the “GENESIS RESPONSIVE SLIDER” widget to the “HOME SLIDER” widget area.
The slider will pull the featured image from your recent blog posts automatically. For the best result, please upload your featured image in at least 1200px width.
Want to choose which blog posts can be used in the slider? Check out our blog post for that.

5 ) If the photos are cropped into a different size, install and activate plugin – Regenerate Thumbnails, then go to Tools > Regen. Thumbnails > Click the “Regenerate Thumbnails” button and wait until the process is complete.

If you do not wish to have the slider pull the featured image from your blog posts just a regular image slider, you could install any slider plugin. We recommend “Meta Slider”.
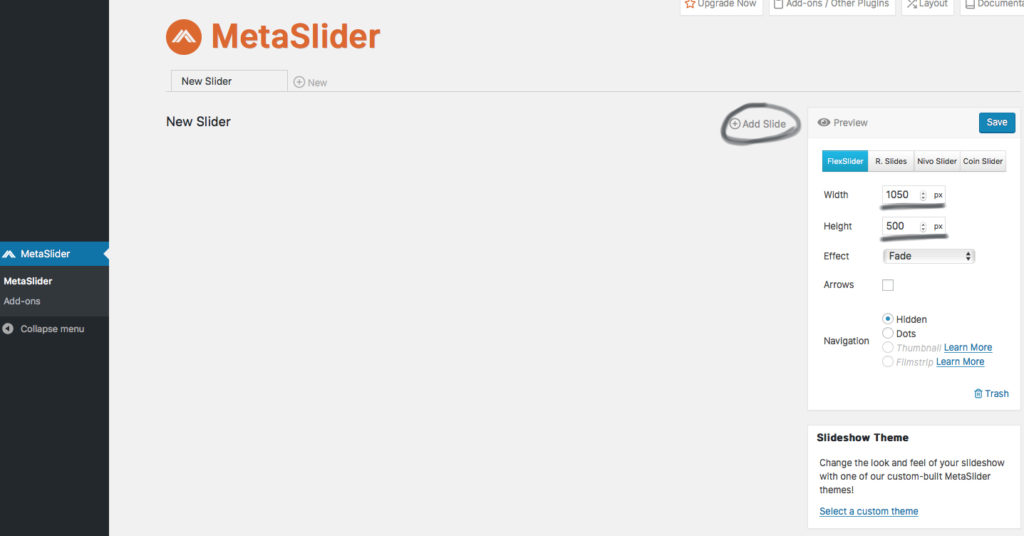
Once you have it installed and activated, go to the MetaSlider page and create a new slider with your own images.
When everything is ready, go back go to the widget page and drag the “MetaSlider” widget to the “Home-slider” widget area.


