1 ) Please go to your Appearance > Widgets.
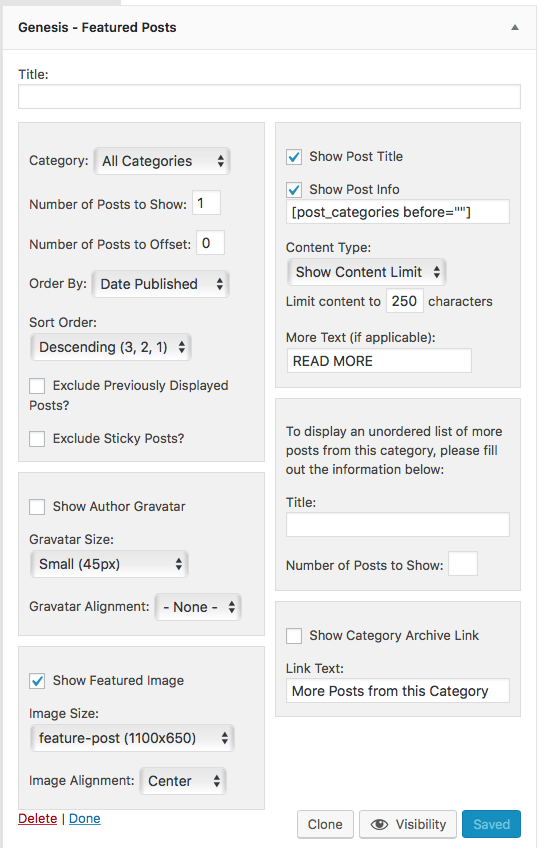
2 ) Drag a “Genesis Featured Posts” widget to the “Ed-Header-Latest-Post” widget area and configure the settings just like the demo below.
*You could choose to display a specific post from any of the category from the “Category” drop down.
*If you would like to display the third blog post, enter the digit “3” in the “Number of Posts to Offset” box. If you’d like to display the fifth post, enter the digit “5”. The seventh post, enter “7”…etc.


“AFFILIATE PROGRAM WIDGET” IN THE POST FOOTER
1 ) Go to the individual edit post page, scroll down the page you’ll see the “CUSTOM FIELD” panel. If you don’t see it, go back to the top of the page, click the “SCREEN OPTIONS” drop down. Check the custom field box and scroll back down the page, it should shows up.
2 ) Click “Enter New” > type “affiliate” in lowercase in the “Name” field > insert your affiliate program widget code to the “Value” field > click “Add Custom Field” then save the post.
You need to complete the above steps if it’s your first time adding this widget to your post. Once the custom field has been added, it will be saved in your custom field library. You just need to open the “select” drop down menu and select “affiliate” from the list for your next post.


If you don’t see the custom field panel, scroll back up to the top of the page > Click the Screen Option > check the “Custom Field” box. The custom field panel should be appear now.

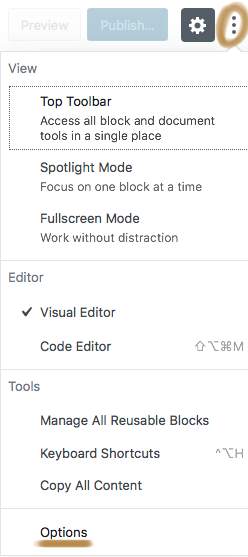
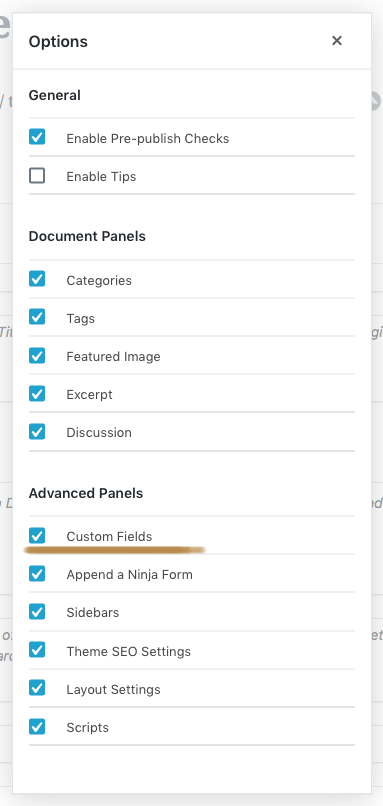
If the version of your WordPress is 5.0 or above, please click on the three dots icon and click “OPTION“. A small window will popup in the center of the page, click “CUSTOM FIELD” and the page will reload automatically with the custom field option.

